
g. Remove the vehicle commander and the gunner.
(1) If the turret is operational and the gunner or the commander can rotate
the turret, that soldier should rotate the turret until the turret opening is aligned with the
turret shield door and then turn off the turret power drive to prevent the turret from
accidentally moving during casualty removal. The commander and the gunner can then
be pulled into the troop compartment, treated for life-threatening injuries, and removed
through the ramp opening or the ramp door.
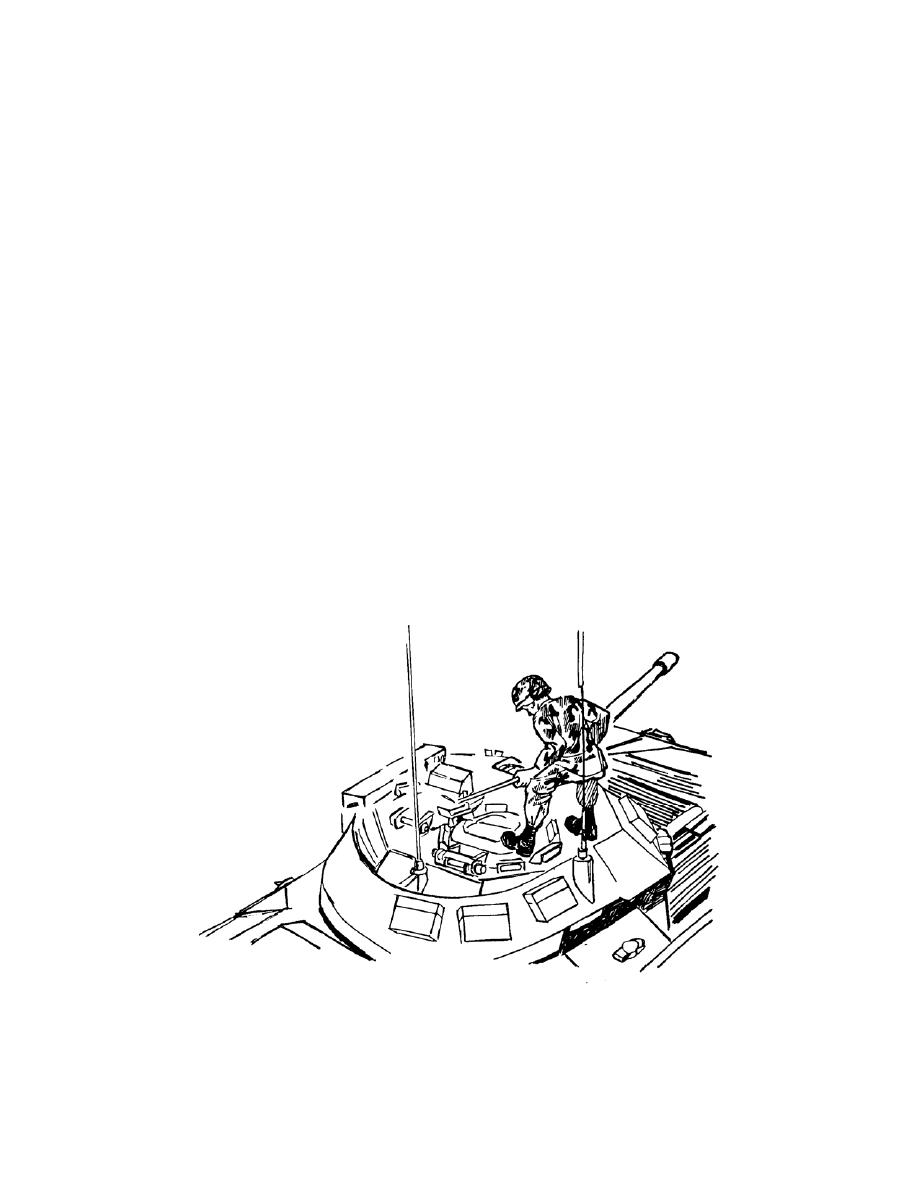
(2) If the turret cannot be rotated, remove the commander and the gunner
through the commander's hatch and the gunner's hatch. The gunner's hatch can be
opened from the outside by prying on the hatch with a crowbar between the gunner's
right periscope and the commander's left periscope. Use the mattock head as a pivot
for the crowbar (figure 6-7). Treat the commander and the gunner for any life-
threatening injuries; then lift them through the hatches using pistol belts in a manner
similar to the driver and move them to a place of safety.
h. Remove personnel in the troop compartment. Enter through the ramp door or
the cargo hatch and lower the ramp. (This step may be accomplished by the rescuer
who enters the vehicle to assist with removing the driver.) Treat any life-threatening
conditions; then evacuate casualties out the ramp. If the ramp is inoperative, evacuated
the casualties through the ramp door. If neither the ramp nor the ramp door can be
used, evacuate the casualties through the cargo hatch. The cargo hatch is used only as
a last resort because of the difficulty in evacuating casualties through the hatch.
Figure 6-7. Prying open the gunner's hatch on a BIFV.
MD0001
6-10

 Previous Page
