
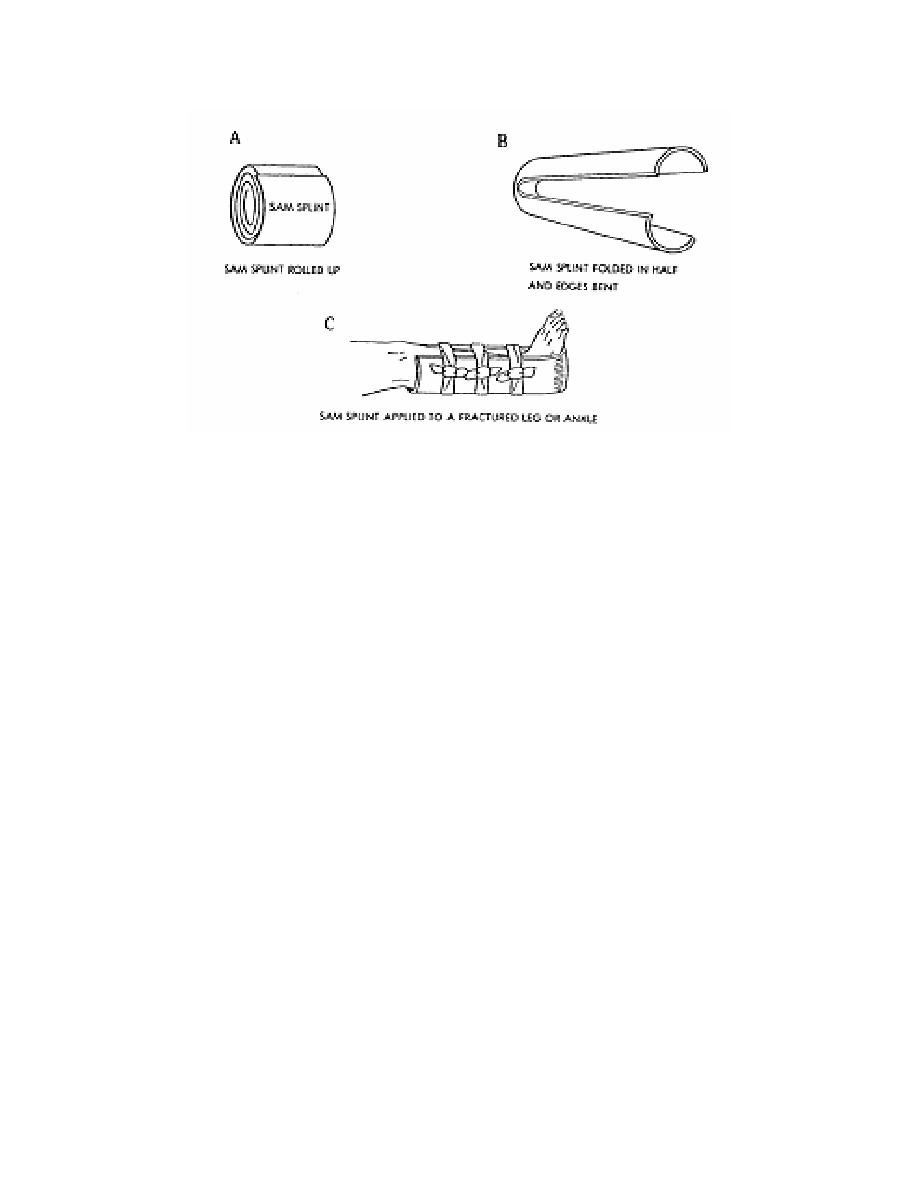
Figure 4-13. SAM splint applied to a fractured ankle.
c. Bend the edges of the splint in until the splint generally conforms to the curve
and shape of the foot and leg being splinted. Each half of the splint will have a "U"
shape (see figure 4-13B). Bending the edges also increases the rigidity of the SAM
splint.
d. Flatten the vertex of the splint so the bottom of the casualty's foot will fit
comfortably.
e. Check the casualty's pulse below the fracture/dislocation site.
f. Apply the splint around the casualty's foot and leg. Adjust the shape of the
SAM splint to conform to the limb, if needed.
g. Secure the splint using at least three cravats (see figure 4-13C).
(1) Tie the tails of the cravats in a non-slip knot on the outside of the splint.
Tuck the ends of the tails into the cravat to prevent accidental entanglement when the
casualty is moved.
(2) Check the casualty's pulse after each cravat is applied. If the pulse can
no longer be detected, loosen the cravat and apply it again.
MD0533
4-17

 Previous Page
