
(2) Slide the cradle under the casualty's boot until the sole of the boot
touches the bottom of the L-shaped splint.
(3)
Lower the casualty's foot until the boot fits into the cradle.
(4)
Apply padding to the sides, if needed. The boot should be sufficient
padding.
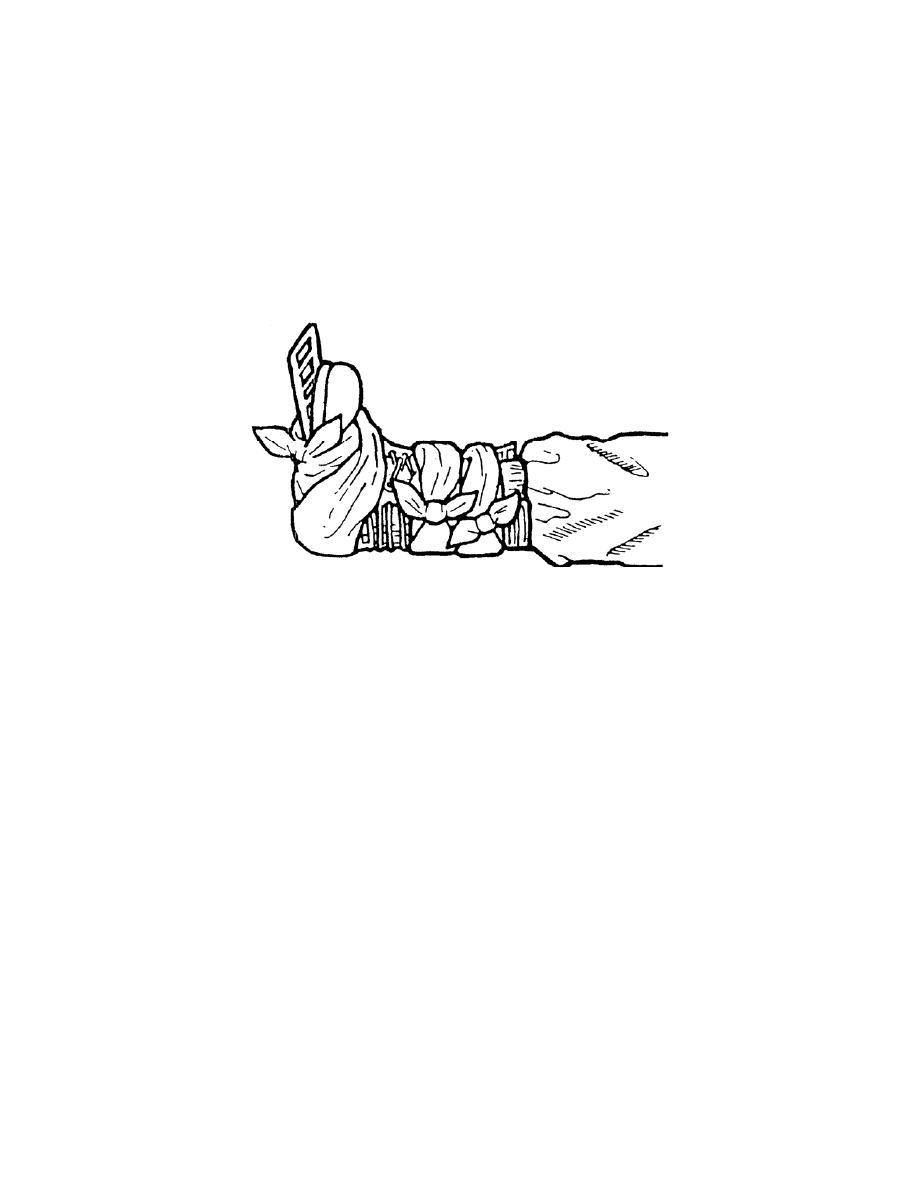
f. Secure the Rigid Splint With Cravats. Figure 4-11 shows a two-piece wire
ladder splint applied to a left ankle.
Figure 4-11. Wire ladder splint (two pieces) applied to a fractured ankle.
(1) Apply a cravat immediately above the ankle. Begin on the outside of the
leg, bring the tails to the inside, cross them, bring them to the outside again and tie the
tails in a non-slip knot on the outer part of the U-shaped wire ladder splint.
(2) Check the casualty's pulse. If a pulse could be felt before but is no
longer present, loosen and retie the cravat. If the pulse still cannot be felt and you can
slip two fingers beneath the knot, evacuate the casualty as soon as possible after the
splint is applied.
(3) Apply the second cravat below the ankle. Cup the heel of the boot in the
center of the cravat and bring the tails up across the top of the boot. Cross the tails on
the top of the boot toe, take them down under the sole of the boot, and tie the tails in a
non-slip knot on the outer aspect of the rigid splint.
(4) Check the casualty's pulse. If a pulse could be felt before but is no
longer present, loosen and retie the cravat.
(5) Apply the third cravat at the top of the splint in the same manner as the
first cravat. Tie the cravat in a non-slip knot on the outer aspect of the rigid splint.
(6) Check the casualty's pulse. If a pulse could be felt before but is no
longer present, loosen and retie the cravat.
MD0533
4-14

 Previous Page
