
c. Reassemble Parts in Reverse Sequence. Refer to figure 4-11.
NOTE:
Take care not to pinch electrical wires.
(1)
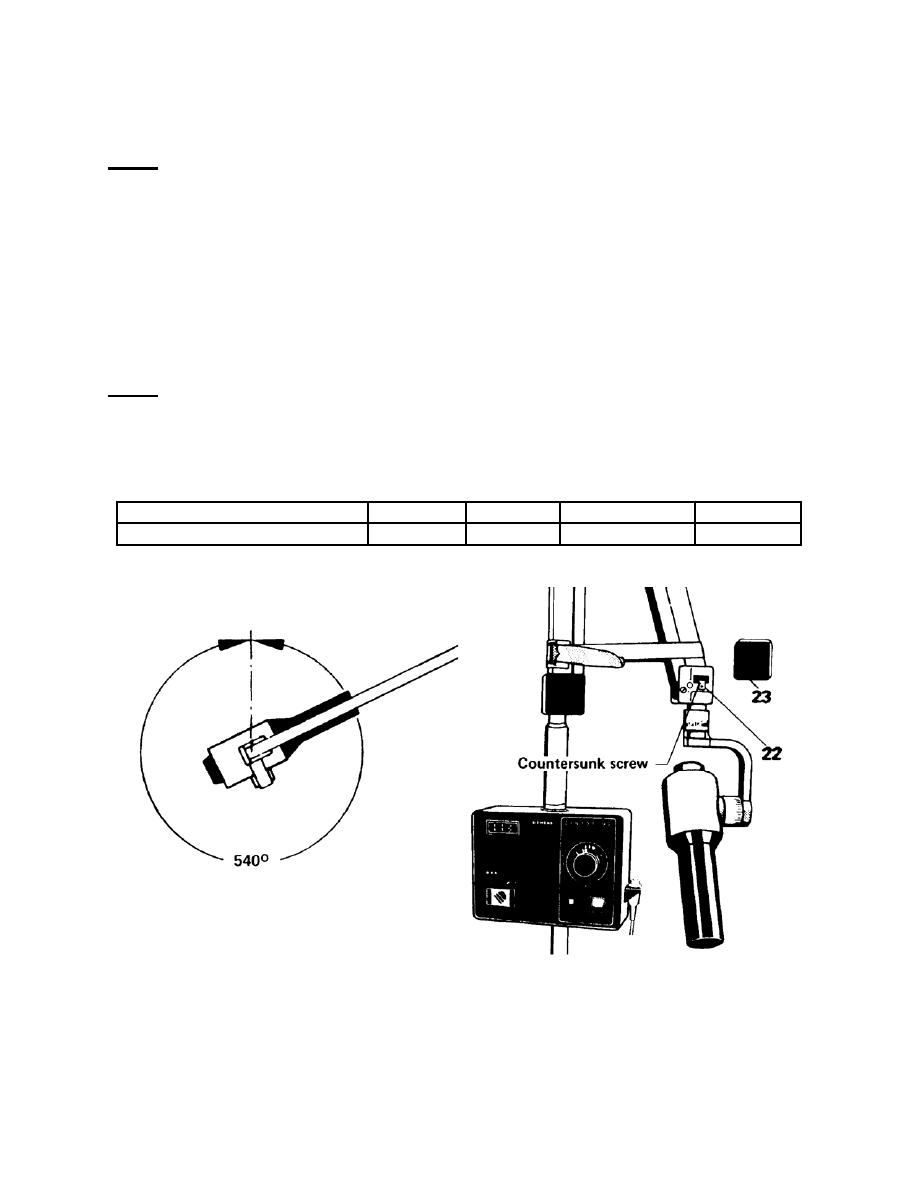
Grease the bracket (22).
(2)
Secure the shaft with the bracket (22) to the arm using the countersunk
screw.
(3)
Install the brown cover over the joint (23); it snaps into place.
(4)
Test the tube head rotation from stop to stop from 540 (1 1/2 turns).
NOTE:
Rotation beyond 1 1/2 turns indicates improper assembly. Wiring damage will
occur if not corrected.
(5) Connect the five wires of the X-ray tube assembly to the wires of the
scissors arm according to the markings. Refer to figure 4-12. and the chart below.
X-ray tube assembly wires
3
4
5
6
Scissors arm wires
3
4
5
6
Figure 4-11. X-ray head reassembly, part one.
MD0361
4-15

 Previous Page
